Idea No.
23120
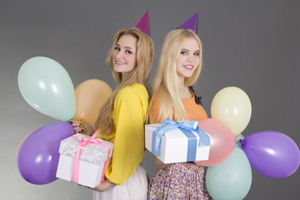
Valentine's Day Ball -16yr- Dance Studio
Award
Date
August 2011
From
Hayley in Ventura, CA, United States
Runner Up
For my Sweet Sixteen in February, I decided to throw a Valentine's Day Ball! This is the perfect, easy theme for anyone who's birthday is around the time of the holiday. I wanted to have a memorable party with quite a few people (about 75-100), so my first task was to choose a venue! (This was around 10 months before the party date). After many late nights of online research, and endless phone calls to every hotel, country club, dance studio, and hall in the city, I scheduled a few appointments to visit places in person. I would DEFINITELY recommend visiting venues in person, EVEN IF you have seen the place before. I finally made my mind on a Dance Studio called the House of Dance. At this point, I was starting to realize that throwing a fancy party in a nice venue, with nearly 100 guests, was going to be pricey. I didn’t want to ask my parents to pay for the party completely, so I decided to try to raise as much money as possible on my own! I put up ads for babysitting and tutoring, started doing odd jobs around the house, and began to save any money that I made or received for holidays etc. For any other teens planning an expensive party, I would really recommend doing this! Not only will it help take the financial burden off of your parents’ shoulders, but it will also encourage you to be more careful with your spending for the party. I ended up saving about $1,000 and my parents, (very proud of me!) decided to put in the same amount each! (See, hard work pays off:) So now I had a $3,000 budget for my party. Ready, Set, Plan!:)
INVITATIONS: It seems that most companies really rip customers off with printing invitations! So, why not do it yourself? Every week in the mail, Michael’s Craft Store sends out a 40% off coupon. You can also print them online! So I went to Michaels and, with my coupons, bought packs of very simple yet classy white invitations with a silver border. The pack came with 50 invitations, 50 invitation envelopes, 50 response cards, and 50 response card envelopes, and I bought 3 packs (ALWAYS count on mess-ups and needing extras). I was able to print the invitations on a standard printer by using the online instructions for those specific invitations. The text was in black cursive writing and said You’re Invited to Hayley’s Sweet Sixteen (Next Line) Valentine’s Day Ball, followed by the party details. Then I used a single hole-puncher to punch two small holes about 1 inch apart near the top of each invitation and tied a beautifully sheer, red Valentine’s Day bow on each one. You can find videos of how to tie a bow so that BOTH ends hang down (yes, it’s different than the way you tie your shoes!) online on Youtube or a similar site. Then I placed the invitations in the envelopes with the response cards (don’t forget to pre-address those, and stamp them, of course!) and sealed the envelopes with a silver seal that said Hayley’s Sweet Sixteen. You can buy sheets of seals in any color from most craft stores, and print them out at home.
DECORATIONS: The Dance Studio was set up so that half of it was a dance floor and the other half was round tables. We covered the tables with red, white, and pink linens which looked lovely, and put one red rose in a small bud vase in the center, on a white doily. You might be surprised that they sell bud vases at the dollar store! I was too:) I’d really recommend investing in linen table cloths instead of the cheap plastic ones, or even renting them! It makes the atmosphere so much more elegant! Also on each table was a disposable camera, and I must say that was one of the biggest hits of the night! People had a GREAT time taking pictures of each other, and so many moments were caught on those cameras. Buy them in bulk and they’re not THAT expensive. The walls were decorated with red and white holiday lights, streamers, and Valentine’s Day cut outs. At the front of the dance floor, I had my masterpiece decoration! The first thing I did was I made two balloon columns. The hard part of making these is constructing the base. I’ve seen everything from plastic poles in small tubs of cement to professionally-made balloon poles. What I did was bought, for each balloon pole, a 2’ by 2’ piece of wood and nailed on a 8-inch metal piece that sticks up from the middle of the wood. Then a white PVC pipe goes on top of the metal piece and it works out perfectly. You need about 40 balloons per balloon pole. I used Red, Pink, Black and White. Blow them all up, tie two together, twist two pairs into a flower of 4 balloons, and then twist it onto the balloon pole, starting from the bottom and working your way up. You can view endless videos/tutorials of this on youtube.
Then I took lightweight white string, about 15 feet long, and marked a black mark with a sharpie about every 12 inches and tied a helium balloon to each black mark. I then tied one end of the string to one balloon column and the other end of the string to the other balloon column, the helium balloons lift the string up, and you have an AWESOME balloon-column-arch-THING. I also got a helium 1 balloon and a 6 balloon and tied them to little red heart weights and let them float right under the arch. It was beautiful! In the foyer of the Dance Studio I had a blown up baby picture of me and a portrait of me in my pink gown that I had taken about a month before the party. Also in the foyer were many valentines’ day mylar helium balloons, weighted by high heeled red, black and pink shoes (SO CUTE). There were bouquets of chocolate roses, bouquets of real roses, and my very tall friend with a clip board and the list who acted as a bouncer and made sure the only people who were there, were actually supposed to be there. When guests walked in, they got their hand stamped with a Celebrate Stamp, and got a pink glow bracelet. The lighting was so perfect, thanks to my wonderful venue, with pink and red hues that really helped the Valentine’s Day atmosphere.
ACTIVITIES: The main focus of the night was of course, dancing. I hired a DJ and gave him a song list to play. I also gave him a dozen or so flashing heart necklaces (dollar store!) to throw out to the really good dancers! I also had a dance instructor come and do a group lesson! This was one of the funniest parts of the night. She taught quick lessons of cha cha and salsa and made everything so fun! People were cracking up at their terrible dancing skills, but it got everyone on the floor and encouraged boys and girls to dance together more. For another activity, I had guests sign a black poster board with a white Sharpie brand paint pen. My portrait in my gown was in the middle (about 5’’ by 7’’) and people signed all around it. What a great way to remember the party! It is on my wall as we speak. Another fun thing for guests to do was get their pictures taken. A close family member, who is a GREAT photographer, rented a fancy camera and the necessary lighting-stuff to take professional looking pictures. We assembled a backdrop by hanging a silver sheet from the wall and down onto the floor. On the sheet we put a white wedding arch (also from Michaels…use those coupons!!) with little white lights weaved in it, and guests stood under the arch to have their photos taken in groups or couples, etc. Also at the end of the night, I brought up my four best girl friends who had helped me greatly with the party, and thanked them with a few words of gratitude, a box of chocolates and a bouquet of flowers.
COSTUMES: (more like dress code!): I asked my guests to adhere to a Valentine’s Day color theme of red, pink, black, and/or white, and this went over EXTREMELY well. We took lots of pictures, and it looks so cool because everyone kind of matches, in a way! Also, it really adds to the theme when people dress the part. In addition to this, although it was somewhat expensive, I ordered red T-Shirts for my staff that I designed online with the name of the party and a Valentine’s Day theme. By staff I mean my parents, a few close friends’ parents, the DJ, the Dance Instructor, the Photographer, and a few cleaning ladies that were helping keep the messes to a minimum! These people worked so hard and really completed the night, I want to thank them so much!
PARTY SNACKS: When planning the party, I knew that, when teens are dressed up and dancing, snacks are not the most important thing on their minds. However I wanted to have SOME light foods for the hungrier partiers. For serving, we bought assorted glass dishes from garage sales or on-sale in stores. They don’t need to match in shape if they’re all clear, they still look really nice! We put out snack-size brownies decorated with heart-shaped sprinkles, strawberries, red licorice, small wraps with meat/veggies/cheese, sushi platters, crackers and cheese, chips and dips, and m&ms in little pink buckets. This was SUPER easy, not expensive, and very sufficient for this type of party. As for drinks, we had one large black tub full of ice with a scooper and two 3-gallon plastic drink dispensers (Fruit Punch and Lemonade). You can get these plastic drink dispensers for $10-20 each. We also had those bottles of Martinelli’s Apple Cider that kind of look like wine, this was of course very popular for us teenagers. In addition, there were a few pitchers of water. WARNING: The drinks will need to be refilled A LOT.
CAKE: I chose to buy a beautiful red velvet cake with white icing, two tiers. The baker did a SUPERB job. And I didn’t go to one of those fancy cake places that charges $12/slice (that would be a $1200 cake?! NO WAY!!!) I went to a small, local bakery that made a cake to serve 100 for only $130! He did such a great job. I gave him a large silver H to put on the top, thick red ribbon to wrap around each tear, and red rose petals for decoration, the final result was absolutely beautiful and elegant.
FAVORS: My friends and I had so much fun with this. A week before the party, I had my close friends sleepover and help me make the favor boxes. What we did was we bought a TON of white Chinese to-go boxes from Smart and Final. Then we laid them all out on old sheets in the driveway and SPLATTERED them like CRAZY with red and pink paint. When they dried a few hours later, we flipped them over and did the same to the other side. Then we cut out one red heart for each box and wrote, Thank You! On it and glued it to the box. We filled them with Sweethearts, chocolate hearts, lollipops, and other random candies from Costco. They were adorable favors to hand out to all of the guests. All in all the party was a great success. It wouldn’t have been possible without all of the people around me and their special talents, helpful hands, and words of advice. USE the NETWORK of people around you and your party will be so much better. You know you have an Aunt who loves dance music, or your mom’s best friend who majored in photography in college. USE THESE PEOPLE! Lastly Good Luck with your party :) I’m sure it will be fabulous.

.
About Birthday Party Ideas | Privacy Policy | Contact Us
BirthdayPartyIdeas.com - Birthday party ideas to help you plan your kids birthday party celebration.
NutcrackerBallet.net - Nutcracker information, performance directory and ballet reviews.
www.Bashions.com